Mom at home scientist

Ecology of my motherhood; analyzed, frugal, and (mostly) natural.


1 Comment

Easy Fermented Rice For Digestibility and Increased Nutrition

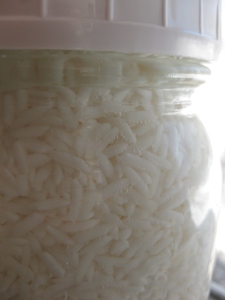
Mason Jar of Fermented Raw Rice

Mason Jar of Fermented Raw Rice

When I was a teenager, I was diagnosed with a particular food intolerance by our naturopathic doctor. I had had chronic eczema on my face for over a year, as did my younger sister on her arms and neck, and so we drove over 10 hours to see this particular doctor who had a unique way of looking at allergies and intolerances. He diagnosed my intolerances as eggs (any part thereof) and grain/dairy combinations. I was told I could have either grain or dairy, but not both within 6 hours (gastric emptying) of the other. So for the next 10 years, I followed his suggestions, with complete healing of my complexion issues and also massive improvements in gastro-intestinal health issues. I was actually unaware of my issues in the digestive department until I actually abstained from those foods and could tell within an hour if prepared foods actually had something I wasn’t allowed to eat in it. Well, eventually I came across the nutritional book, Nourishing Traditions, which teaches the Weston A. Price diet. The WAP diet holds that grains are easier to digest and more nutritious when they are fermented, soaked and/or sprouted (1,2, 5, 6, 7, 8, 9). So it was with much caution that I decided to start dabbling in these alternative preparation methods and testing them on myself in the presence of dairy products. My first success was with sprouted wheat bread. After 10 years, can you even guess how much I just wanted delicious grilled cheese sandwiches?!

My second experiment was with fermenting grains. I am happy to say that this also seems to be a great success! This greatly improves my food budget as well, as I can now plan meals with economically bought grains that just need a little preparation.

Regardless, I wanted to share with you my routine with fermenting rice. I fill a quart Mason jar with rice up to the shoulder of the container, including about ½ cup from a previous ferment. If you don’t have a previous ferment, use a splash of raw apple cider vinegar, raw kombucha, raw kombucha vinegar from an overactive continuos ferment, or some whey which drains off of your plain yogurt or sour cream. I cover the rice with filtered water. I cap the jar and shake it around a bit until I can tell that some of the foggy water of the previous fermentation has made its way into the new water added. Then I open the lid again and add more water to rinse any grains off of the walls above the water line, and to bring the water level to about where the cap threads start. I place the jar on a dishcloth, in case it overflows due to carbon dioxide production, and let it sit on my counter for a couple of days, or even weeks, as long as you pour off and replace the water above the line of the grains daily. As long as I see the little bubbles around the grains in the jar, I know that the rice is fermented enough for me.

Rice Fermentation Bubbles close-up

Rice Fermentation Bubbles close-up

When I am ready to make my rice, I keep track of how much rice I take from the jar, which is easy since Mason jars have measurements along the side of them. I spoon the rice into a mesh colander and rinse it thoroughly, before putting it in an adequate sized saucepan. If I want sticky rice, I add an equal amount of filtered water. If I want something more al dente and very separated, I will put my rice in a steamer basket, and only steam it. Usually, I add a little less than an equal amount of water to rice. So if I am cooking 2 cups of fermented, uncooked rice, I add about 1 ¾ C. water, or a combination of water and coconut cream or broth. I also add salt. I throw the ingredients all in the pan at the temperature they happen to be, and turn the stove up until it boils, I put a lid on it and reduce the heat to simmer. I don’t think it even takes 10 minutes, but the length of cooking also has to do with personal taste and the dish you are preparing it for.

Bubby fermenting rice

Bubbly fermenting rice

Easy Fermented Rice                                                            

3 Cups rice

1 quart mason jar with lid

Filtered water

Choice of starter- previously fermented but not rinsed rice, raw apple cider vinegar, raw kombucha, raw kombucha vinegar, or whey from cultured yogurt or cultured sour cream

salt

Directions: Fill mason jar with rice and starter up to the 3 Cup measurement line. Fill to top of grain with filtered water. Cap and vigorously shake about 6 times. Place upright, uncap, rinse with additional water and stray grains that are now above the water line or on the cap into the jar. Fill with water up to the bottom of the threads. Cap jar again. Place on dishtowel, on counter until small gas bubbles are visible around grains (about 2-4 days) while changing out the water above the grain line daily. Note measurement level of fermented grain. Scoop grain out into a mesh sieve and rinse the rice thoroughly, while leaving at least ¼ Cup of unrinsed fermented grain for a starter for your next batch in the jar. Note the amount of rice you removed as you will want slightly less than an equal amount for cooking. After rinsing, move rice to a non-reactive saucepan and add salt & water. Bring to boil, reduce heat to simmer & cover until cooked according to your preference.

Enjoy!!!


References

1) http://www.westonaprice.org/health-topics/living-with-phytic-acid/

2) http://www.westonaprice.org/health-topics/be-kind-to-your-grains-and-your-grains-will-be-kind-to-you/

3) http://www.nourishingdays.com/2012/01/fermented-grains-the-perpetual-soured-porridge-pot/

4) http://www.foodforlife.com/about_us/ezekiel-49

5) http://www.tandfonline.com/doi/abs/10.1080/10408398909527507#.VMsIJy5K4no

6) http://www.sciencedirect.com/science/article/pii/S0740002009001749

7) http://jn.nutrition.org/content/130/8/1991.short

8) http://journals.cambridge.org/action/displayAbstract?fromPage=online&aid=844904&fileId=S0007114567000492

9)   http://www.sciencedirect.com/science/article/pii/S0308814608002513


Leave a comment

Grain-free, Gluten-free Stromboli

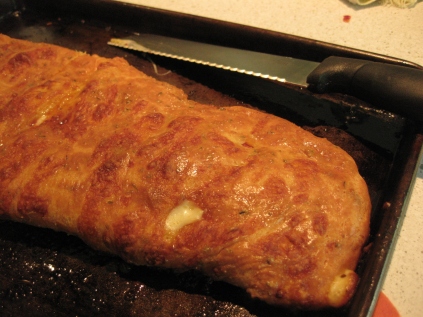
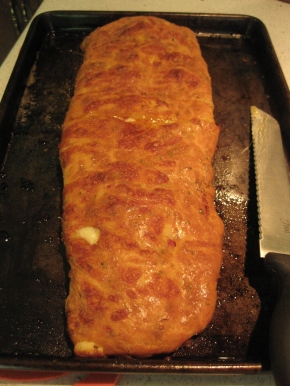
Stromboli done well- grain-free

Stromboli done well- grain-free

So… it has been awhile since my last post, but let me tell you, I have only been up to good! Ha! Well, and morning sickness did put a dent in my activities after harvest season. So, as a juicy little starter, I want to share a great creation using my delicious tapioca cheese bread recipe that the sexy chemist, my hubby, came up with. You don’t need a degree to pull this one off though. Grain-free Stromboli… uhm… YUM!


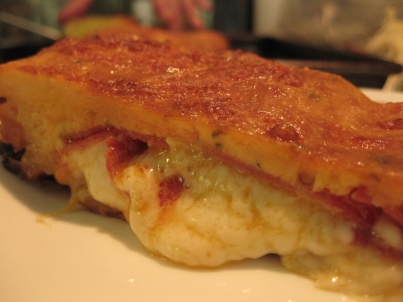
Cheesy, grain-free delicious pepperoni Stromboli

Cheesy, grain-free delicious pepperoni Stromboli

As you can see, my little minion agrees…


Approved Stromboli!

Approved Stromboli!

First, start out by making one batch of cheese bread dough. The recipe is here.

Now, instead of creating rolls, you want to roll the dough out, into a rectangle, until it is a little thicker than pie crust… roughly 1/2cm. We end up using from ½ to ¾ of the cheese bread. Traditionally, people use a rolling pin but I like to use a wine bottle, as that is what I have on hand. I think it is easiest to roll the dough off of your surface if you put wax or parchment paper under it first. If you would like to mimic the cornmeal that is typically spread under a pizza crust, we roughly blended some buckwheat grits until it reached the desired size, and used that instead.

Preheat the oven to 450 degrees F.

After getting your dough rolled out, we layered mozzarella cheese, cheddar cheese, pepperoni sausage, and mushrooms on all but the top 2 inches of the long side of our rectangle. This is really the step where you customize your pizza to your tastes, so use the ingredients you choose!

At this point, you want to gently start to roll up your Stromboli, starting with the bottom, long-side of your rectangle, until you use the whole dough. I prefer to finish the rolling on the cookie sheet or jelly-roll pan I plan on cooking it on. The longer you work the dough, the warmer it gets, the more fragile and hard-to-work-with it becomes.

Now you need to pinch the dough, along the final long edge, somewhat to get it to seal to the layer below it. You may have some tears along your dough surface, don’t worry about it because now you don’t need to put a few slits on top. If your roll is perfect, congrats and you can put a few decorative slits along the top where you want them!

Be sure to switch your oven to bake mode.

Bake for roughly 30-40 min. or until it looks nicely brown to you. This time can really vary by oven and the thickness of your Stromboli.

While my bread is cooking, I like to make my own pizza sauce to dip my Stromboli in. You could buy this, or use spaghetti sauce even, but I prefer my homemade recipe anyways.

Enjoy the wonderful grain-free goodness that you have just created!

Stromboli finished

Stromboli finished


Leave a comment

Real Science and Natural Wonder; Dandelion to Prevent Atherosclerosis

Dandelion Flower from Wikimedia

Sometimes I come across a study that is too good not to share! Just a heads up disclaimer though; these statements have not been evaluated by the FDA. That doesn’t mean there isn’t any real merit though, just that dandelions aren’t a regulated drug. This doesn’t mean that they aren’t AS effective, or more so, than drugs you may be prescribed, but only that they aren’t a patentable creation that would garner enough profit to pay for the regulatory system and the expensive studies needed for their rubber-stamp of approval.

So, the study I stumbled across is from the International Journal of Molecular Sciences and is titled, “Hypolipidemic and Antioxidant Effects of Dandelion (Taraxacum officinale) Root and Leaf on Cholesterol-Fed Rabbits.” You can find the article here.

In a nutshell, there were 4 groups of animals. The control group (the normal one) received a regular rabbit diet, a high-cholesterol group, a high-cholesterol and dandelion leaf supplemented group, and a high-cholesterol and dandelion root supplemented group.

What they found was that dandelion greatly affected the rabbits by reducing artery damage by cholesterol, lowered “bad” cholesterol, raised “good” cholesterol and acted as a potent antioxidant. Antioxidants are known to be beneficial by protecting dietary lipids from oxidation, suppressing the onset and development of atherosclerosis, and reducing the progression of atherosclerosis lesions .

So there you have it! Eat dandelions!!!

So, how do you go about it? Dandelions taste best in the spring but are still beneficial to eat throughout the year. This spring, I dug up a lot of dandelions. I chopped up roots finely, dried them and then ran them through a blender. This created a great medium for use as tea, or to add to your broth that you make as a base for meals.

IMG_6433

I used the tops as greens in salads and on sandwiches in place of lettuce. I threw the greens, flowers and roots into broths and into the freezer for future stock making. I chopped the leaves up and sauteed them with the goodies for omelets. My mother in-law even suggested battering and frying up the flowers, but it was too late in the season by the time I thought I’d try that. Next year I plan to make dandelion wine and dandelion chocolate too! 🙂


Int. J. Mol. Sci. 2010, 11(1), 67-78; doi:10.3390/ijms11010067