Mom at home scientist

Ecology of my motherhood; analyzed, frugal, and (mostly) natural.


1 Comment

Easy Fermented Rice For Digestibility and Increased Nutrition

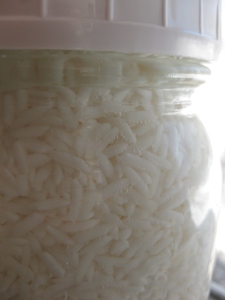
Mason Jar of Fermented Raw Rice

Mason Jar of Fermented Raw Rice

When I was a teenager, I was diagnosed with a particular food intolerance by our naturopathic doctor. I had had chronic eczema on my face for over a year, as did my younger sister on her arms and neck, and so we drove over 10 hours to see this particular doctor who had a unique way of looking at allergies and intolerances. He diagnosed my intolerances as eggs (any part thereof) and grain/dairy combinations. I was told I could have either grain or dairy, but not both within 6 hours (gastric emptying) of the other. So for the next 10 years, I followed his suggestions, with complete healing of my complexion issues and also massive improvements in gastro-intestinal health issues. I was actually unaware of my issues in the digestive department until I actually abstained from those foods and could tell within an hour if prepared foods actually had something I wasn’t allowed to eat in it. Well, eventually I came across the nutritional book, Nourishing Traditions, which teaches the Weston A. Price diet. The WAP diet holds that grains are easier to digest and more nutritious when they are fermented, soaked and/or sprouted (1,2, 5, 6, 7, 8, 9). So it was with much caution that I decided to start dabbling in these alternative preparation methods and testing them on myself in the presence of dairy products. My first success was with sprouted wheat bread. After 10 years, can you even guess how much I just wanted delicious grilled cheese sandwiches?!

My second experiment was with fermenting grains. I am happy to say that this also seems to be a great success! This greatly improves my food budget as well, as I can now plan meals with economically bought grains that just need a little preparation.

Regardless, I wanted to share with you my routine with fermenting rice. I fill a quart Mason jar with rice up to the shoulder of the container, including about ½ cup from a previous ferment. If you don’t have a previous ferment, use a splash of raw apple cider vinegar, raw kombucha, raw kombucha vinegar from an overactive continuos ferment, or some whey which drains off of your plain yogurt or sour cream. I cover the rice with filtered water. I cap the jar and shake it around a bit until I can tell that some of the foggy water of the previous fermentation has made its way into the new water added. Then I open the lid again and add more water to rinse any grains off of the walls above the water line, and to bring the water level to about where the cap threads start. I place the jar on a dishcloth, in case it overflows due to carbon dioxide production, and let it sit on my counter for a couple of days, or even weeks, as long as you pour off and replace the water above the line of the grains daily. As long as I see the little bubbles around the grains in the jar, I know that the rice is fermented enough for me.

Rice Fermentation Bubbles close-up

Rice Fermentation Bubbles close-up

When I am ready to make my rice, I keep track of how much rice I take from the jar, which is easy since Mason jars have measurements along the side of them. I spoon the rice into a mesh colander and rinse it thoroughly, before putting it in an adequate sized saucepan. If I want sticky rice, I add an equal amount of filtered water. If I want something more al dente and very separated, I will put my rice in a steamer basket, and only steam it. Usually, I add a little less than an equal amount of water to rice. So if I am cooking 2 cups of fermented, uncooked rice, I add about 1 ¾ C. water, or a combination of water and coconut cream or broth. I also add salt. I throw the ingredients all in the pan at the temperature they happen to be, and turn the stove up until it boils, I put a lid on it and reduce the heat to simmer. I don’t think it even takes 10 minutes, but the length of cooking also has to do with personal taste and the dish you are preparing it for.

Bubby fermenting rice

Bubbly fermenting rice

Easy Fermented Rice                                                            

3 Cups rice

1 quart mason jar with lid

Filtered water

Choice of starter- previously fermented but not rinsed rice, raw apple cider vinegar, raw kombucha, raw kombucha vinegar, or whey from cultured yogurt or cultured sour cream

salt

Directions: Fill mason jar with rice and starter up to the 3 Cup measurement line. Fill to top of grain with filtered water. Cap and vigorously shake about 6 times. Place upright, uncap, rinse with additional water and stray grains that are now above the water line or on the cap into the jar. Fill with water up to the bottom of the threads. Cap jar again. Place on dishtowel, on counter until small gas bubbles are visible around grains (about 2-4 days) while changing out the water above the grain line daily. Note measurement level of fermented grain. Scoop grain out into a mesh sieve and rinse the rice thoroughly, while leaving at least ¼ Cup of unrinsed fermented grain for a starter for your next batch in the jar. Note the amount of rice you removed as you will want slightly less than an equal amount for cooking. After rinsing, move rice to a non-reactive saucepan and add salt & water. Bring to boil, reduce heat to simmer & cover until cooked according to your preference.

Enjoy!!!


References

1) http://www.westonaprice.org/health-topics/living-with-phytic-acid/

2) http://www.westonaprice.org/health-topics/be-kind-to-your-grains-and-your-grains-will-be-kind-to-you/

3) http://www.nourishingdays.com/2012/01/fermented-grains-the-perpetual-soured-porridge-pot/

4) http://www.foodforlife.com/about_us/ezekiel-49

5) http://www.tandfonline.com/doi/abs/10.1080/10408398909527507#.VMsIJy5K4no

6) http://www.sciencedirect.com/science/article/pii/S0740002009001749

7) http://jn.nutrition.org/content/130/8/1991.short

8) http://journals.cambridge.org/action/displayAbstract?fromPage=online&aid=844904&fileId=S0007114567000492

9)   http://www.sciencedirect.com/science/article/pii/S0308814608002513


8 Comments

Gluten-free, Grain-free Tapioca Cheese Bread; My Favorite Bread

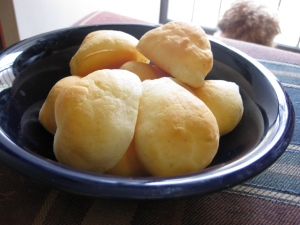
Grain-free deliciousness

Grain-free deliciousness

I love the windows and doors to other recipes available to me in Spanish. Last year I stumbled upon this gem here while on laylita.com, a blog on Ecuadorian recipes. Although I had studied abroad in Ecuador, I never had the pleasure of eating this bread until I made it. It is originally called Pan de Yuca, which means Yucca Bread. We, here in the US, call yucca by the name of tapioca.

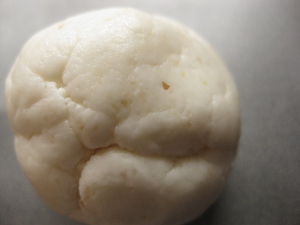
Pan de Yucca before baking

Pan de Yucca before baking

I particularly LOVE this bread for Oh so many reasons!
1)It is FAST
2) It is cheesy!
3) It is versatile!
4) It is grain-free
5) It is high in protein(for a bread) and healthy fats

IMG_6509

So I thought I would translate the recipe for you with healthier (the original is healthy, but some ingredients can be improved) ingredient suggestions!
This is great for gluten-free people too, as long as you shred your own cheese.

Tapioca (Cheese) Bread
20-25 rolls

2 1/2 Cups Tapioca Flour/Starch
4 Cups(1 Lb.) Shredded Mozzarella Cheese
1 Teaspoon Baking Powder (aluminum-free)
Pinch of Celtic Sea Salt (not bleached)
4 oz (1/2 cup) room temperature butter(from grass-fed cows)
2 eggs (pastured and fertilized)
If necessary, 1-2 Tablespoons of filtered water, if the dough is too dry to work into balls.

To Prepare:
Preheat oven to 500 F (that is not a typo!). In a food processor, combine flour, cheese, baking powder and salt & mix well. Add the butter, and eggs then mix until the dough forms small balls… or until it looks like it has mixed really well. This is where you would add the extra water if the dough seemed too dry.
Remove the dough from the processor and make golf-ball sized dough balls. Place on a cookie sheet or jelly roll pan. I usually only cook half of the recipe and save the rest in the fridge until another day. You can do this mixing all by hand in a bowl… just use your hands and all of the ingredients at once.
Bake for about 5-7 minutes at 500 F, then turn to broil setting and brown your rolls for about 3-5 minutes.

Grain-free deliciousness

Grain-free deliciousness

Then serve while warm, that is, if you don’t eat them all first! These go great with any soup, just as a side, and your kids will love them… to the point you feel like hiding them from the tots.

You can also adapte this recipe by substuting half of the mozzarella with sharp cheddar, as a reader posted in the comments, or jalapeno jack, if you want to add some kick!

Grain-free Tapioca cheese bread.

Grain-free Tapioca cheese bread.


Leave a comment

Quick Chemistry Quip for Nutrition: AB ≠ A ≠ A + B


Water (H2O, essential ingredient to life and 60-70% of your body) is not the same as oxygen (O2 needed for respiration but toxic in too high or low of levels). You take oxygen and ad 4 measly hydrogens and you get water. You can breathe oxygen, in the right proportions and live happily. Add those hydrogen atoms and you die… unless you drink it. Route of exposure is central to toxicity.

Neither is oxygen (O2) or water (H2O) the same as hydrogen peroxide (H2O2). Add one more oxygen to water and you get a wonderful toxin, made especially in your cells to kill invaders before spitting them out(1) or to commit suicide if the cell ‘decides’ something has gone wrong with themself (say cancer)(2)… a “for the greater good” decision for the community of cells that make up the whole person… you.

It really ‘gets my goat’ when doctor advise against or for certain foods because they believe they are quoting real evidence (what they refer to as “evidence based medicine.”(3)). I mean, the reality is that they are often telling you… “Don’t eat item A…” because somewhere… there is a study which said “AB” was bad for you. That is like saying, “Don’t breathe oxygen ever,” because they read a study which showed how detrimental it was to breathe water.

Even substances which have the exact amount of particular molecules can have vastly different consequences in the body if they are merely rearranged. Think of a paddle wheel at a grist mill. Take that same paddle and make it so it only will turn in the opposite direction of normal. Will that grist mill continue to function? No. It won’t.

So the point is… any ingredient which has its chemical structure altered, can no longer be considered the same ingredient! It may be derived from that same source… but I can derive distilled water from milk, and it is not the same. Or, I can make butter from the cream from that milk… still, very different in how it is used and I didn’t even add any molecules to make it. So to say that soybean oil, after being hydrogenated, is merely hydrogenated soybean oil… is fallacy and deceit. The same goes for lard. When you read how bad lard is for you, do they specify that it is the hydrogenated product of chemical processes to create a different substance which still, falsely, retains the name of lard, or was it rendered from fat by merely heating it enough to separate the oil from the flesh? A ≠ AB.

Always look, listen and research critically, asking these important specific questions when any statement is made.

So that is why a doctor may tell you not to eat coconut oil if you have heart disease, even though studies show how beneficial it can be (4). Or not to eat lard (5) if you have diabetes, when there are also studies that support it (6).


1. http://www.sciencedaily.com/releases/2008/01/080102134129.htm

2. http://www.ncbi.nlm.nih.gov/pubmed/19723104

3. http://www.cochrane.org/about-us/evidence-based-health-care

4. http://www.sciencedirect.com/science/article/pii/S0009912004001201

5. http://europepmc.org/abstract/MED/17752774/reload=0;jsessionid=oWg4jiX8Ul5CX3xzUr79.18

6. http://onlinelibrary.wiley.com/doi/10.1111/j.1460-9568.2005.04125.x/abstract;jsessionid=1634196F8DD0946FBE83BA3EB10D3F25.f03t04?deniedAccessCustomisedMessage=&userIsAuthenticated=false